how to change fitbit versa band
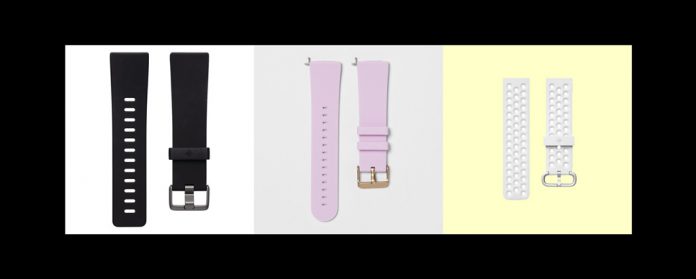
Need or want to replace your Fitbit Sense or Versa's wristband (Versa, Versa 2, Versa 3, or Versa Lite) but can't figure out how exactly to remove the current band?
While Fitbit has always been pretty good about making life easier for those who want to customize their smartwatches, changing out your bands is not one of those "easy" things.
Although Fitbit introduced an updated system to change out the bands quickly, many owners still have difficulties. If that's you, read on for best practices and tips to change your Fitbit Versa's band.
Related reading
- Fitbit irritating your skin or causing a rash? Let's fix it!
- Find your Fitbit's serial number
- How do I get my Fitbit repaired or replaced under warranty?
- Contact Fitbit customer support about problems and warranty info
- 5 Best Fitbit Versa Chargers (Versa/2/3 and More)
How to change your Versa's or Sense's wristband
Through trial and error, we learned that the best way to change a Fitbit band is to place the Versa (or any Fitbit tracker or smartwatch) face down on a flat surface.
If you normally use reading glasses, we suggest you keep those on when changing bands–glasses definitely help see the band pins or button!
Your Fitbit Versa or Sense comes with two detachable bands–an upper (top) and a lower (bottom) band. Bands connect to the Fitbit pebble with a pin or a button, depending on the model.
- The newer models of Fitbits like the Sense and Versa 3 feature an updated band system that uses a button.
- Older models of the Versa (like the Lite or 2) feature a small pin that allows you to detach and reattach bands.
You only need to replace the bottom band if you're switching between the small and large bands for the same band style.
How to remove a wristband from your Fitbit Sense or Versa 3
Before being able to slap on a new band, you'll need to remove the old one. To do that, flip your Sense or Versa 3 upside down so that the charging pins and heart-rate monitors are facing you.
- Turn your Sense or Versa 3 on its backside and put it on a flat and clean surface
- Locate the band release button for the bottom band
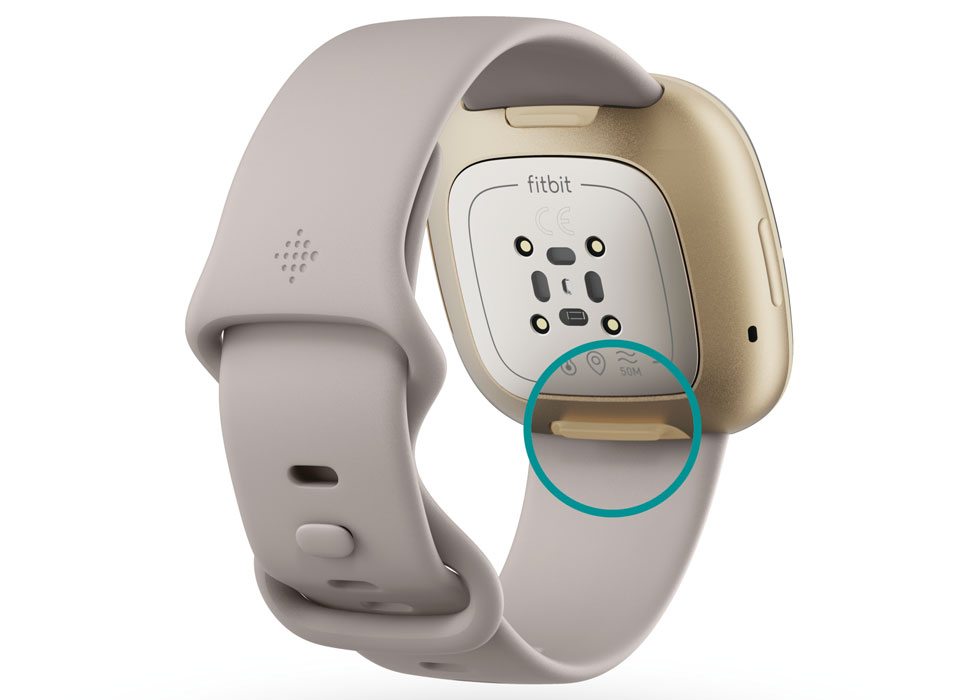
- Press and slide the button down towards the band to release it
- Keeping pressing the button and with your other hand, gently pull the band away from the Fitbit pebble
If you want to replace the entire band, repeat these steps for the top section of the band too.
How to remove a wristband from your Fitbit Versa 2, Lite, or original Versa
First, flip your Versa upside down so that the charging pins and heart-rate monitors are facing up.
- Turn your Fitbit over and place it on a flat, clean surface
- On the bottom band, locate the pin for the quick-release lever
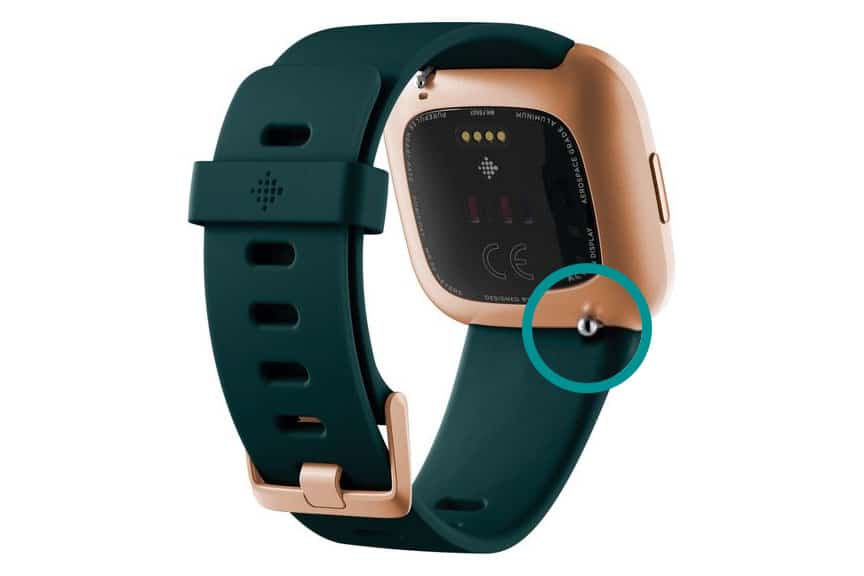
- Press this pin inward and slide the band gently to the opposite side to release it from the watch
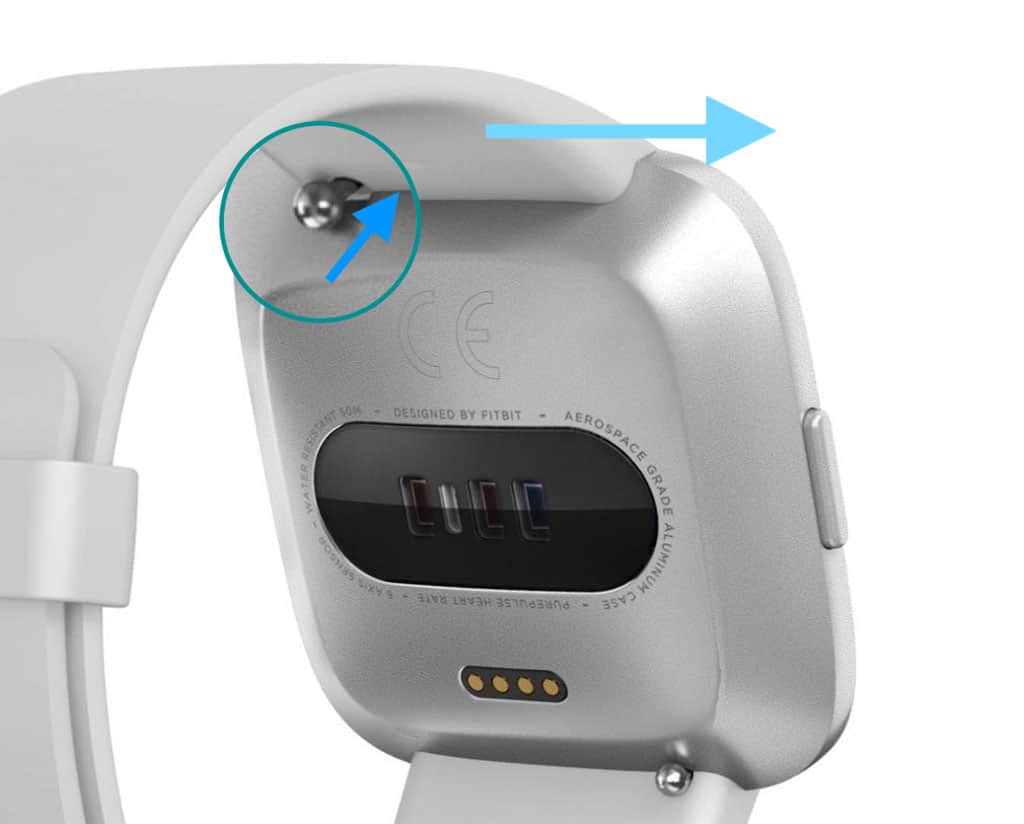
- Once the lever has been pushed in, this means that the band is released from the Versa's grips. Pull the other side of the pinout from the body of the Versa.
- Repeat on the other side, if changing the entire band
The catch in removing Fitbit wristbands is that you want to angle the band a bit so that the other end of the pin slides out. It may be frustrating at first, but it can be done by looking closely at the orientation.
How to replace a band on your Fitbit Versa or Sense
Install your new Sense or Versa band!
Now that your old band is gone, you are left with just the body and your new band.
For newer models like the Fitbit Sense and Versa 3
Replacing the band on these models is a lot easier than earlier models, like the Versa 2!
Before you start, clean the band's ends and gently clean inside the groove where the band attaches to your Fitbit.
To attach a band to your Sense or Versa 3, push the band's ends into the Fitbit pebbles end grooves until you hear a click and the band snaps into place. 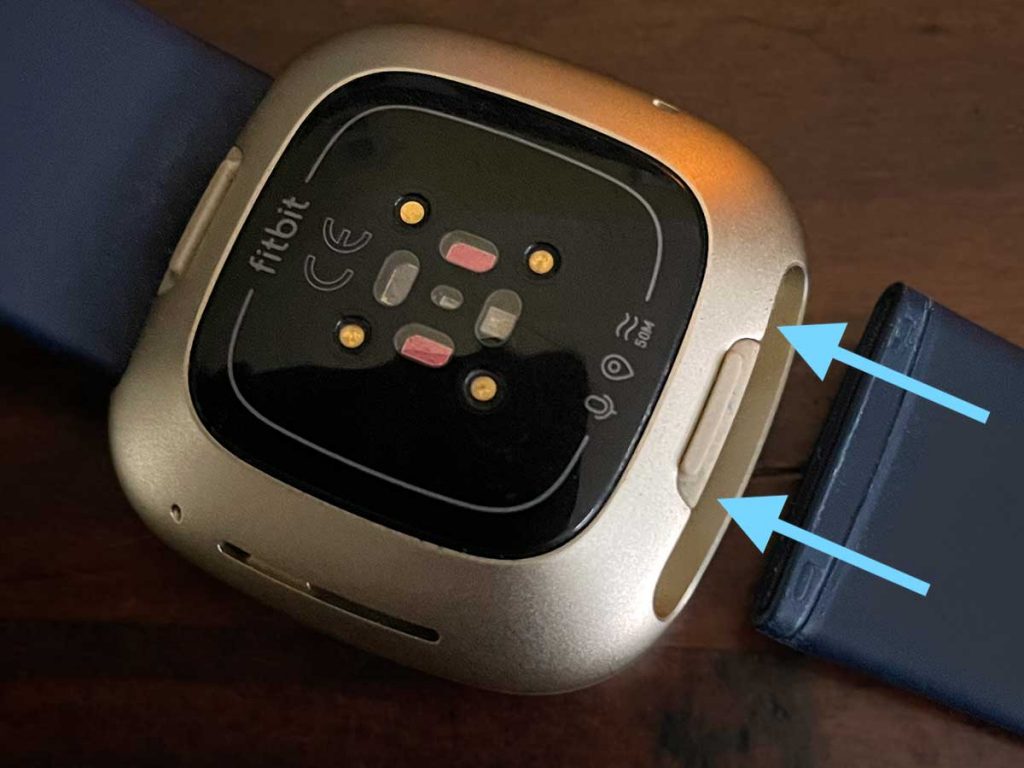
If you're replacing the entire band, remember that the band with the loops attaches to the top of the watch. However, you can switch this placement if preferred–both band ends will attach to either side of your Fitbit pebble.
For older Versa Series, follow these instructions
Before you start, clean the band's ends and gently clean inside the groove where the band attaches to your Fitbit.
- Locate both the holding pin and the quick release lever on each side of your new band
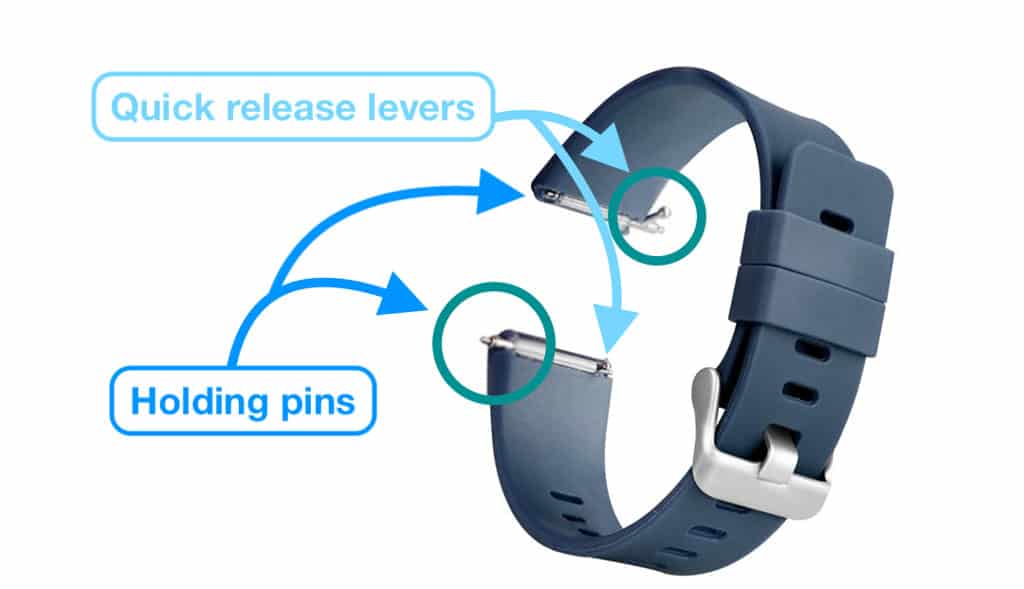
- To attach a new band, hold the band at a 45° angle (A)
- Slide the band's holding pin into the notch on the Fitbit device (B)
- Press the quick-release lever in and push & slide the other end of the band into place (C)

- When both ends of the pin are inserted, release the quick-release lever
- Repeat these steps for the other side, and voila. You have your brand new Fitbit Versa band installed, making it, so you are now stylin' and profilin'. Or, ya know, just going to the gym.
Having more trouble replacing your Fitbit Versa's band?
Take a look at Fitbit's video on how to switch bands on your older model Fitbit Versa!
Conclusion
As we stated above, the Fitbit Versa is one of the best smartwatches on the market, and you really can't go wrong. But we want to hear from you!
Let us know in the comments whether you decided to get a new band for your Versa and which one you chose. Also, if you have run into issues, don't hesitate to leave us a comment, and we will be more than happy to help alleviate these issues!
how to change fitbit versa band
Source: https://www.myhealthyapple.com/change-band-fitbit-versa/
Posted by: guanplakend.blogspot.com

0 Response to "how to change fitbit versa band"
Post a Comment