

How To Get Airpods Pro To Stay In Ear
The AirPods was not the first pair of true wireless earbuds ever—but it's fair to say it made the product category as popular as it is today. It's not perfect, and like any piece of tech, it has its fair share of problems. If you're stuck wondering why music only plays through one earbud on your AirPods Pro or if you can't get your buds to pair with Android then this is for you.
We compiled every problem we could think of or have ourselves experienced with AirPods or AirPods Pro; along with some potential fixes and even some short how-to videos. This is the ultimate guide on how to use your AirPods or AirPods Pro.
Editor's note: this article was updated on November 1, 2021, to address the Apple AirPods (3rd generation)
How to find the model number and serial number of your AirPods Pro

First, let's start with the basics. You might come across issues and fixes that require you to know general product information about your particular set of AirPods. Let's start with the model and serial number. Apple prides itself on its minimal design language so you'll need to know where to look to find these. The first place to find them is in your iOS settings. While the AirPods are connected follow these steps:
- Open the Settings app on your phone
- Click on "General "
- Click on "About"
- Click on "AirPods"
You'll be able to see exactly which model you have and the corresponding serial number. This will work whether you have the original AirPods or the AirPods Pro. If you don't have access to an iOS device, you'll have to look at the AirPods' hardware—look on the underside of either of the earbuds. You'll see a few lines of small text printed on the earbud, the first being the model number. The second line is the serial number of each individual pair of AirPods (only for AirPods 2nd gen and AirPods Pro) but you can also find the serial number under the lid of the charging case.
You can also check the original packaging, receipt, or invoice which will have the serial number printed above the barcode. All of this information can be used to tell you when your particular AirPods were released and which model you have. It's a little easier to tell just by looking at them if you have the originals or the pros, but it's a little harder to tell the difference between the 1st and 2nd gen AirPods. To make it a little easier we've added a chart below so you can verify which AirPods you have.
| Earbuds | AirPods (1st gen) | AirPods (2nd gen) | AirPods Pro |
|---|---|---|---|
| Model Number | A1523, A1722 | A2032, A2031 | A2084, A2083 |
| Release year | 2017 | 2019 | 2019 |
| Charging cases | Lightning case | Wireless case | AirPods Pro case |
|---|---|---|---|
| Model Number | A1602 | A1938 | A2190 |
| Release year | 2017 | 2019 | 2019 |
| Earbud compatibility | Gen 1 & Gen 2 | Gen 1 & Gen 2 | AirPods Pro only |
| Qi wireless charging | No | Yes | Yes |
How to find your software version for your AirPods or AirPods Pro

There's only one way to check the software version of your AirPods or AirPods Pro and it requires an iOS device. While the AirPods are connected:
- Open the Settings app on your phone
- Click on "General "
- Click on "About"
- Click on "AirPods"
Underneath the model and serial numbers in the settings that we spoke about earlier, you'll see a small section for the firmware version. The AirPods automatically updates itself when it is charging in the case and nearby a paired iOS device. So unlike the updates on your phone, you won't have to do anything to install a new version.
Can I update my AirPods manually?
You can't manually update your AirPods. Part of the "magic" of the AirPods lies in its convenience, which means that Apple made sure you don't need to do much in order to be on the latest firmware version. However, that does mean that updates are simply unavailable to Android users.
How to set up your AirPods or AirPods Pro

How to pair with iOS devices
If you're on iOS then the process for pairing your AirPods is super easy. All you have to do is flip the lid open on the AirPods or AirPods Pro near an iOS device. A card will pop up on your iPhone or iPad that will show an animation of the earbuds with a button that says "Connect." Once you press the button, they will pair not only to that particular device but also to any other Apple devices that are affiliated with the same iCloud account, including a Mac computer running macOS Sierra or later. This is thanks to the W1/H1 chips inside the earbuds that allow Apple devices to quickly identify and connect to the AirPods. Unfortunately, that functionality isn't universal so if you're not using an iOS device you'll have to pair these like any other pair of Bluetooth products.
How to pair with Android devices, Windows, or Macs
To pair with anything other than iOS devices (or if the AirPods still won't pair to your Mac) follow these steps. With the earbuds still in the case:
- Flip open the lid so that the earbuds are exposed.
- Without removing the earbuds turn the case around and locate the small setup button towards the bottom.
- Press and hold the button until the small LED light on the case begins blinking.
- The earbuds are now in pairing mode. From here, go into the Bluetooth settings on your device and tap on the AirPods.
How to use AirPods with pairing issues

Sometimes the AirPods just won't show up in the Bluetooth settings list for one reason or another. Whether you can't connect to the earbuds from a new device or you want to give your AirPods to someone else and need to disconnect them from your iCloud account, you're going to need to perform a factory reset. Thankfully, it isn't that difficult to do. To factory reset your AirPods:
- With the earbuds still in the case flip open the lid.
- Without removing the earbuds go into the Bluetooth settings on your iOS device.
- Next to where it reads, "AirPods" click the small "i" icon.
- Click on "Forget This Device" and then click confirm when the notification pops up.
- Now that your phone has disconnected from the AirPods you need to reset the AirPods themselves. To do this hold down the setup button on the back of the charging case with the lid still open for about 15 seconds (or until you see the LED light flash amber).
- Now the AirPods have been completely reset and you can repair to new devices as if they were fresh out of the box.
How to fix auto-pause not working

One of the cooler features of the AirPods and AirPods Pro is that when you remove one of the earbuds whatever you're listening to automatically pauses. It accomplishes this via small proximity sensors built into the earbuds. Sometimes it doesn't work perfectly, and it doesn't work with Android or PC.
If you are using iOS and still can't get this feature to work, then there are two possible solutions. The first is to make sure that you have the feature enabled in the first place and the second is to clean your AirPods to make sure the proximity sensor isn't covered in earwax. To make sure that the feature is turned on:
- Go to the Settings app on your iOS device and click on Bluetooth.
- From there, navigate to where it says "AirPods" and click the small blue "i" icon to the right.
- Look for where it says "Automatic Ear Detection" and make sure that it is turned on.
If it is turned on and you still can't get it to work, make sure there is nothing blocking the proximity sensor from getting an accurate reading. We have an entire article detailing how to clean the AirPods or AirPods Pro to get rid of debris and gunk that might be blocking the sensor. We suggest doing so fairly often not only for functionality but also for hygienic purposes.
What if your left AirPod is not working?

If your AirPods appears to be connected but you still can't get audio to come out of it, then the issue might be with your source device. Regardless of the operating system you're using, try disconnecting your AirPods and then reconnecting them. Put them back in the case for at least 15 seconds while you turn off Bluetooth on your source device and turn on Airplane mode. If it still isn't working try restarting your phone (you'd be surprised how often issues can be solved just by performing a simple restart).
If none of this works, then it is possible to force audio to your AirPods if you're on an iOS device by swiping down to access the Control Center and clicking on the icon of the upper right corner of the audio media box. From here you should be able to choose your AirPods as the desired output for your audio. If none of this works then performing a factory reset on the AirPods is the best way forward.
How to wirelessly charge the AirPods
Apple includes wireless charging capabilities by default with its AirPods Pro noise cancelling true wireless earbuds.
The second-generation AirPods charging case and the AirPods Pro charging case both have wireless charging capabilities. Of course, you can always just plug in a Lightning cable into the bottom of the cases in order to charge your earbuds, but simply placing the case on your bedside table and knowing it'll charge can make you feel like you're really living in the future. To take advantage of this you'll need a Qi-wireless charging pad. Of course, that pad then needs to be plugged into an outlet but at least you won't need to constantly plug in your AirPods.
How to check AirPod battery status
Knowing how much battery is left in your AirPods can be super helpful, especially if you know you're nowhere near an outlet. To determine the charge status of your AirPods and its charging case the easiest method is to just open the lid of the charging case without removing the AirPods. If you hold the case next to an iOS device you should get a small card that pops up to tell you the status of each earbud and the charging case.

On iOS you can also check the battery status widget by swiping right from your home screen. If you don't see it, make sure to enable it by swiping over to the widget screen and clicking "Edit" on the bottom. From there you can scroll down until you see the "Batteries" widget. Click the green + icon to add it and then press "Done" in the upper right-hand corner of the screen. From then on you will be able to check the battery status of your AirPods as well as other Bluetooth-connected devices by swiping over to the widget.
Is something is wrong with my AirPods' battery life?
As it stands, true wireless earbuds tend to not have amazing battery life in general. Some of the better models we've tested (like the Samsung Galaxy Buds Plus) last anywhere from 10-12 hours and some of the worst last only 2-3 hours. The AirPods and the AirPods Pro fall somewhere in the middle of those two extremes, reaching a total of 4 hours, 7 minutes and 5 hours, 6 minutes, respectively. That's especially impressive with the AirPods Pro considering they use battery-guzzling active noise cancelling.
How long the battery lasts depends on a number of factors including the volume at which you're listening to music and whether or not you have ANC turned on (with the Pro model). For reference, we keep our products at a constant output of 75dB while testing because that's the recommended listening level for people who want to avoid noise-induced hearing loss. It's also loud enough that most people won't have a problem listening at this level. If you're playing music at full volume, chances are your buds won't last that long.
If your AirPods lasts anywhere between 3 and 5 hours then it probably doesn't have an issue. Any variance is likely due to the output volume of your music or, depending on when you got your buds, the degradation of the battery over time. While the small size of the AirPods is what makes it convenient, it's also a limiting factor because the small battery doesn't last that long.
My AirPods stopped charging
The new AirPods still doesn't seal to the ear, making it difficult to move around with it in—let alone exercise with it.
If your AirPods doesn't charge, then there are a few steps you can take to ensure that nothing is broken.
First try a different charging cable. If you know the issue is not with your cable because it charges other items like iPhones but not your AirPods, then make sure there is no debris stuck in the charging port. This can be done with something small like a safety pin. It might also be a good idea to check the inside of the case for debris. If there's a piece of debris blocking the magnetic connectors in the case and preventing the AirPods from making contact, the earbuds won't charge.
If none of this works, then it might be time to admit defeat and schedule an appointment with the Genius bar at an Apple store to see if you can get a replacement.
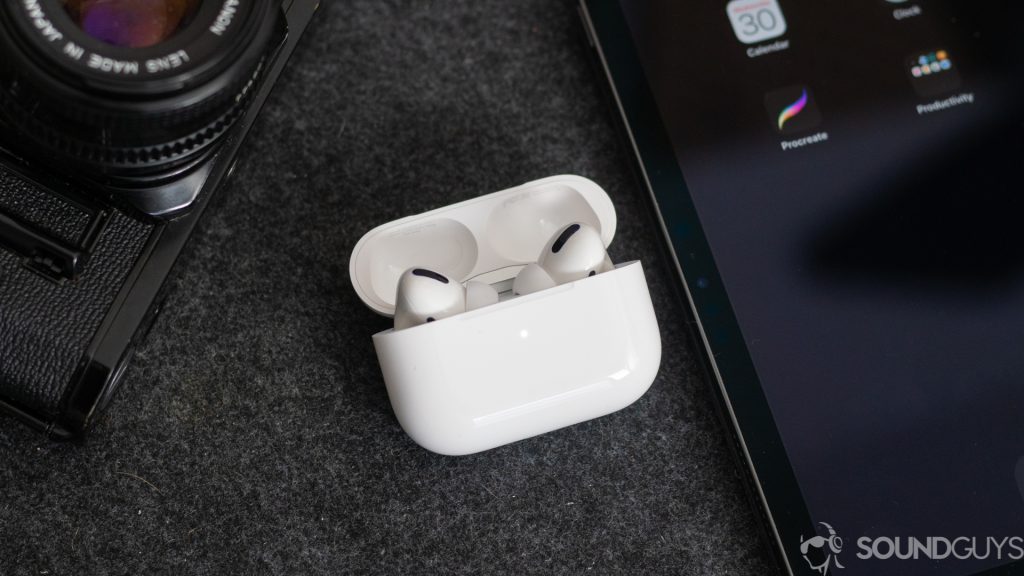
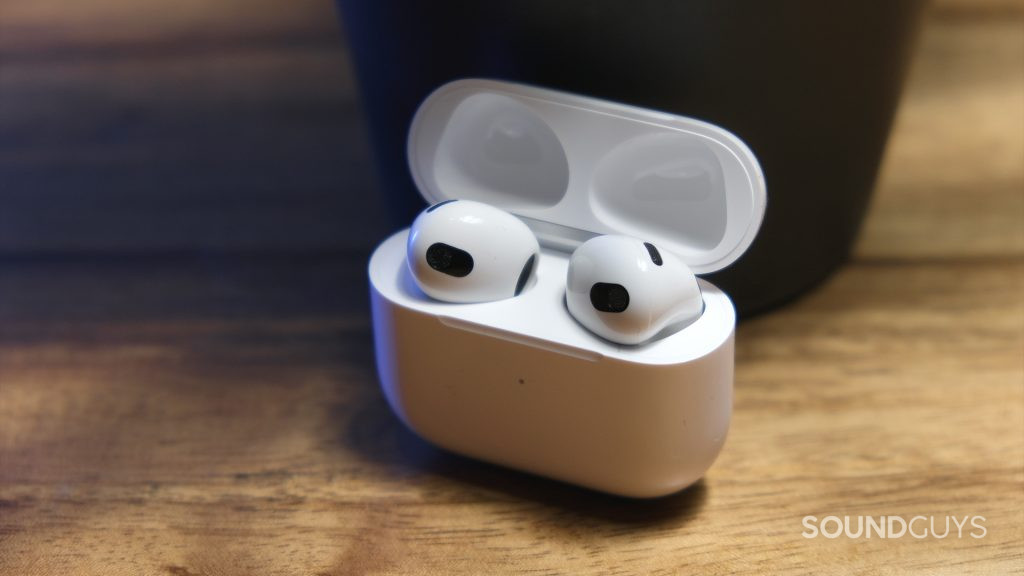
How to make the AirPods and AirPods Pro stay in your ear

The Apple AirPods Pro addresses listeners' complaints about a lack of seal from the previous generations.
The original AirPods had a one-size-fits-all design but it didn't fit all. While plenty of people had no problem wearing it while exercising and going about their day, others (myself included) struggled to get it to stay in the ear at all. The AirPods Pro addressed this problem by including ear tips and a new inside-the-ear-canal design that helped it stay put. If you have the original AirPods and can't figure out how to get it to stay in, check out some third-party accessories like ear tips and wing tips designed to solve this problem. The only problem is that you'll have to remove them every time you want to put the earbuds back in the case which can become a bit annoying after a while.
The AirPods Pro has more elegant solutions for users who can't get a good fit. If none of the included ear tips fit your ears correctly you can also try the Comply Memory Foam tips which are specifically designed for the AirPods Pro. Plus, they also offer some enhanced isolation which will help block even more outside sound.
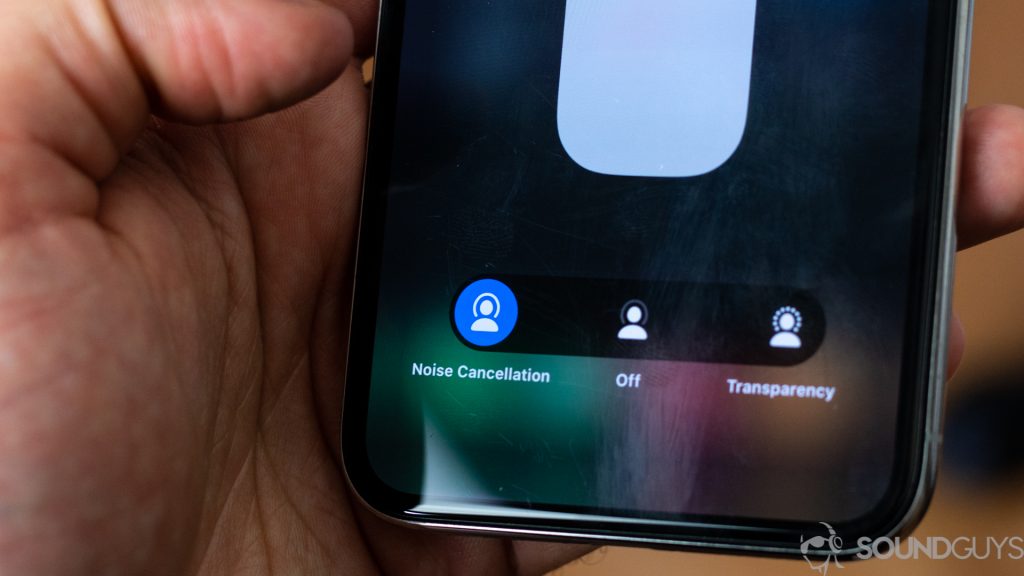
How to use transparency mode & active noise cancelling on AirPods Pro
One of the big selling points of the newer AirPods Pro when compared to the original AirPods is the addition of transparency mode and active noise cancelling. There are four ways to activate active noise cancelling or transparency mode.

The first three methods can be done from your iOS device. While connected to the AirPods Pro swipe down from the top right of the screen to bring down the Control Center. Next, tap and hold the volume slider which should have a small AirPods Pro icon. That will bring up the volume controls of the AirPods Pro with three options along the bottom: noise cancellation, off, and transparency mode. Just pick whichever one you want and you're good to go.
The second method is to go into the Bluetooth settings of your iOS device and click on the "i" icon next to your AirPods. That should open a separate settings page that will give you the same three options. If your hands are busy you can ask Siri to turn on or off noise cancellation or transparency mode.
The fourth method can be done on the AirPods Pro without your phone. Just squeeze and hold the stem of either AirPod and you'll hear a ding sound effect and feel a click that will let you know you've cycled between noise cancellation and transparency mode.
How to get noise cancelling with just one AirPod Pro

You don't need to use both earbuds at all times and people prefer keeping just one AirPod Pro in their ear while they go about their day. To get noise cancellation in one bud all you have to do is:
- Make sure your AirPods Pro is out of the case and connected to your iOS device.
- Go into Settings and click on Accessibility.
- Scroll down until you see a section titled "AirPods" and click on it.
- Towards the bottom, you'll see a toggle that will allow noise cancelling while just one AirPod is in your ear.
My active noise cancelling is worse after the last update
Manufacturers rely on computer chips to fix issues with their products over time. Sony, Bose, and Apple all push out software updates to their products and, like all software, some of these updates contain issues and bugs.
If you feel like your ANC has worsened since the last software update Apple recommends cleaning the mesh area of the earbuds—debris and dirt can sometimes get in the way and weaken the noise cancelling. Some people noticed the AirPods Pro's noise cancelling degrade after a software update in 2019. As of 2021, the issue has been fixed, but if you're experiencing issues with the ANC, make sure your AirPods are updated to the latest software version. To update your AirPods just make sure they are charging in the case next to an iOS device and it will update automatically.
How do you set up Spatial Audio with my AirPods Pro?
Apple introduced Spatial Audio, which mimics the effects of surround sound, to the AirPods Pro with iOS14. It is only compatible with the AirPods Pro and the following Apple devices running version 14 or later:
- iPhone 7 or later
- iPad Pro 12.9‑inch (3rd generation) and later
- iPad Pro 11‑inch
- iPad Air (3rd generation)
- iPad (6th generation) and later
- iPad mini (5th generation)
If all your devices are compatible, you can enable spatial audio by following these steps:
- Go to Settings, then Bluetooth.
- Find your AirPods Pro in the connected devices list and tap the info button.
- Turn on Spatial Audio.
From there, you can demo the feature by tapping "See & Hear How It Works…", found underneath the toggle switch. Currently, Spatial Audio is only supported by a select few apps, including Apple TV+, Disney+, and HBO Max—though this list is expected to grow in the coming months. If you want to try out Spatial Audio without having to pay for an app or service, try watching a movie trailer on the iTunes Store from a compatible iOS device.
To check if Spatial Audio is active, first open the Control Center. Force touch or long-press on the volume slider. Underneath the slider, you will see the Spatial Audio icon. If the icon displays a speaker animation, this indicates that the feature is working with the application you're currently running.
How do you share audio with AirPods or Beats headphones?
If you own the AirPods or AirPods Pro, you can share audio to another pair of AirPods or compatible Beats headphones, so long as you're connected to an Apple device running the latest version of iOS or iPadOS. Compatible headphones include:
- AirPods Pro
- AirPods (1st generation), AirPods (2nd generation), and AirPods (3rd generation)
- AirPods Max
- Powerbeats
- Solo Pro
- Powerbeats Pro
- Powerbeats3 Wireless
- Beats Solo3 Wireless
- Beats Studio3 Wireless
- BeatsX
- Beats Flex
To share audio with another pair of AirPods or Beats headphones, perform the following:
- Connect your AirPods or Beats headphones to your iOS device.
- Tap the AirPlay icon in the control center, lock screen media player, or in your current media app.
- Tap "Share Audio".
- If your second device is a pair of AirPods, hold them close to the device with the AirPods inside the case and the lid open. If the second device is a pair of Beats headphones, put them into pairing mode and hold them close to the device.
- When the second device appears on the screen, tap "Share Audio."
Once connected, you can control the volume of both the primary and secondary headphones through the AirPlay settings.
Does AirPods work with Android?
The AirPods works on both Android and iOS, but don't expect it to work perfectly.
If you have an Android phone then you'll be happy to know that the AirPods and AirPods Pro both work fine with Android. You can easily connect to them just like any other pair of Bluetooth earbuds, though you'll likely miss out on some features that only work with Apple devices. Also, since you can't update the AirPods' firmware manually, you'll need to occasionally pair it to an iPhone.
So what features will you be missing if you pair to AirPods on Android? The most obvious is the seamless pairing process. Due to the lack of a W1/H1 chip in Android devices, you won't be able to quickly pair to the AirPods or AirPods Pro. Instead: you'll have to pair manually and look through Bluetooth settings. On top of that, there are a few other features that you won't have access to.
What features is the AirPods missing on Android?
- No Siri. Unfortunately, you won't have access to Siri if you're on Android so if that's your assistant of choice then you're out of luck.
- No Spatial Audio. This AirPods Pro-exclusive is only available on Apple devices running the latest version of iOS 14.
- No Audio Sharing. Once again, this feature is only limited to Apple devices running iOS 14.
- Auto-pause. On iOS devices taking one earbud out of your ear will auto-pause your music while placing it back in your ear will resume music. This isn't available on Android.
- Using a single AirPod. Unfortunately, if you're on Android you won't be able to just use a single earbud.
- Seamless switching. AirPods are great if you're in the Apple ecosystem. They can switch easily from your iPhone to your iPad or Mac, but if you're on Android that isn't the case. You'll have to go into Bluetooth settings and manually connect and disconnect every time.
- Checking battery life. If you're on an Android device you can't check the battery life of your AirPods the same way you can on iOS.
- Customizing any feature. In the settings app of iOS, you can customize a number of features ranging from playback controls to a fit-test with the AirPods Pro. None of those features are available on Android.
- Firmware updates. Apple doesn't currently make a device management app for Android, which means that you will need access to an iOS device to install any updates.
How to change the name of your AirPods or AirPods Pro

In order to change the name of your AirPods, you're going to need access to an iOS or Mac device as it can't be done on Android or Windows devices. To change the name of your AirPods on iOS just follow these steps:
- With the AirPods connected go into the Settings app.
- Click on "Bluetooth" and look for your AirPods.
- Tap on the small blue "i" icon next to the AirPods.
- Click on the "Name" section and input the new name that you want for your AirPods.
If you're on a Mac then the steps are slightly different but still easy.
- Open the System Preferences app on your Mac.
- Click into the Bluetooth section.
- Find your AirPods in the list of paired devices and right-click on it to bring up some more options.
- Select "Rename" and type in the new name of the AirPods.
- Confirm by clicking the "Rename" button once you're done.
How to clean AirPods case
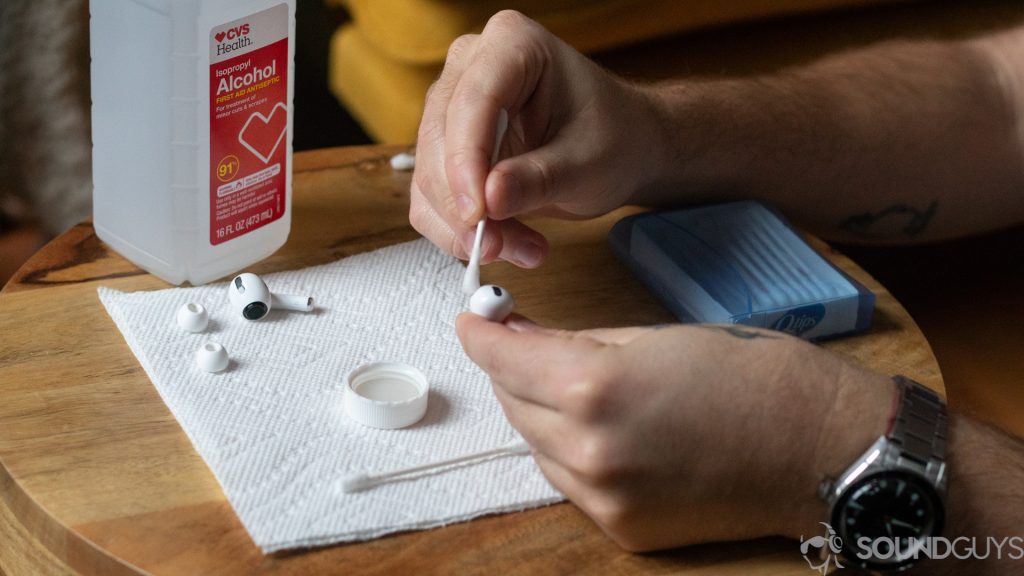
If you're looking to clean your AirPods case then you should follow our step-by-step instructions on how to clean both the earbuds and the case in our full article. If you can't be bothered with that right now then here's the short version.
First, you'll need some rubbing alcohol (70-90%), q-tips or cotton swabs, a paper towel, and some dish soap and warm water. Then you'll want to clean the case without getting it soaking wet. Rubbing alcohol tends to be somewhat harsh with some headphone materials so don't be too heavy-handed. You just want enough to kill any bacteria that could potentially find its way into your ear. For the rest of it use warm water and soap.
Do these fixes apply to the Apple AirPods (3rd generation)?
The earbuds have bass reflex ports on the top edge. If you force the main nozzle output into the ear canal you don't get the low-end contribution from the rear port.
Yes, you can fix any problems with the Apple AirPods (3rd generation) by following the steps above. There are some differences between the AirPods (3rd generation) and older AirPods models: the third-gen AirPods supports spatial audio with head tracking (like the AirPods Max and AirPods Pro). What's more, the AirPods (3rd generation) includes a MagSafe-compatible charging case, so you can use it with the same Apple MagSafe charger as you use with your iPhone.
While the AirPods (3rd generation) looks a lot like the AirPods Pro, it lacks features like active noise cancelling and Transparency mode. You don't really need the latter with the AirPods (3rd gen) because its open-type fit lets in virtually all background noise anyway.
How to use AirPods or AirPods Pro
So you have a new pair of AirPods or AirPods Pro; congratulations! While they get their fair share of hate, they're both products that many people enjoy. There are plenty of bells and whistles that come along with owning a pair of AirPods, but Apple prides itself on making its products super easy to use. For the most part, all you need to do is open the case and put the earbuds in your ears to start using them. Of course, there is a little more to it than that so if you want to know everything about how to use AirPods, make sure to check out our full reviews!
AirPods review:

AirPods Pro review:

How To Get Airpods Pro To Stay In Ear
Source: https://www.soundguys.com/how-to-fix-problems-with-airpods-33924/
Posted by: guanplakend.blogspot.com
0 Response to "How To Get Airpods Pro To Stay In Ear"
Post a Comment